Epic Online Services サンプルの AuthAndFriends のコードリーディング ⑤

前回 で各 UI 要素の配置に関してざっと眺めました。

今回は AuthDialog 要素を見ていきます。

AuthDialog の構成要素

void FAuthDialogs::Create()
{
    if (!ParentDialog)
    {
        return;
    }

    CreateLoginIDPasswordDialog();
    CreateLoginExchangeCodeDialog();
    CreateLoginDeviceCodeDialog();
    CreateLoginDevAuthDialog();
    CreateLoginAccountPortalDialog();

    CreateDeviceCodeCancelLoginDialog();
    CreateMFALoginDialog();

    CreateUserLoggedIn();

    SetStartLoginMode();
}

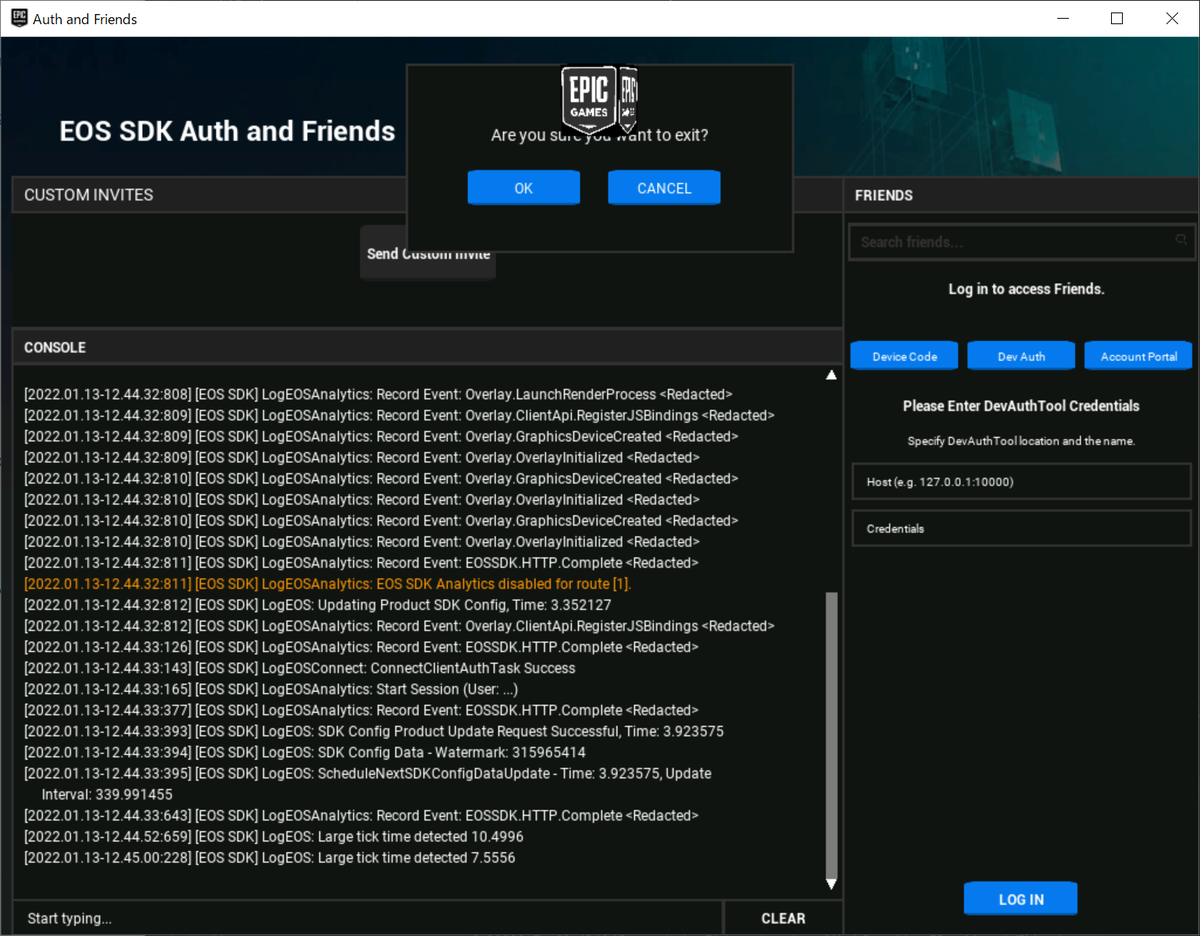
上記のように FAuthDialogs では、多くの Dialog が生成されています。ですが起動すると、ログイン方法は 3 種類しか提供されていません。

FAuthDialogs::FAuthDialogs(DialogPtr Parent,
                           std::wstring DialogLoginText,
                           FontPtr DialogBoldSmallFont,
                           FontPtr DialogSmallFont,
                           FontPtr DialogTinyFont) :
    ParentDialog(Parent),
    LoginText(DialogLoginText),
    BoldSmallFont(DialogBoldSmallFont),
    SmallFont(DialogSmallFont),
    TinyFont(DialogTinyFont),
    SavedLoginMode(ELoginMode::AccountPortal),
    NewLoginMode(SavedLoginMode)
{
    LoginMethods = 
    {
#ifdef DEV_BUILD
        FLoginMethodButtonData(L"Password", ELoginMode::IDPassword),
        FLoginMethodButtonData(L"Exchange", ELoginMode::ExchangeCode),
        FLoginMethodButtonData(L"Device Code", ELoginMode::DeviceCode),
        FLoginMethodButtonData(L"Dev Auth", ELoginMode::DevAuth),
        FLoginMethodButtonData(L"Account Portal", ELoginMode::AccountPortal)
#else
        FLoginMethodButtonData(L"Device Code", ELoginMode::DeviceCode),
        FLoginMethodButtonData(L"Dev Auth", ELoginMode::DevAuth),
        FLoginMethodButtonData(L"Account Portal", ELoginMode::AccountPortal)
#endif
    };
}
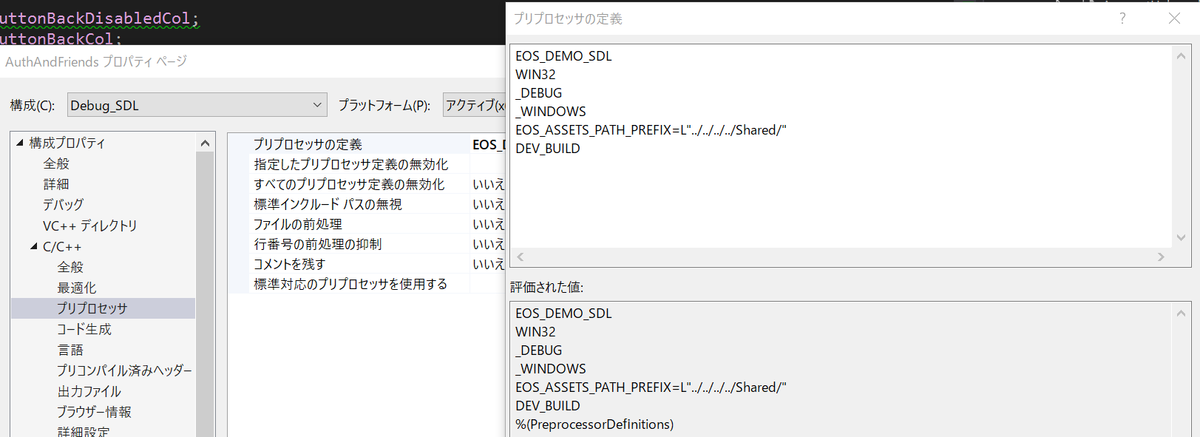
改めてコンストラクタを見ると、 DEV_BUILDコンパイラオプションで LoginMethods が大きく異なっていることが分かります。
では DEV_BUILD でビルドしてみます。

f:id:you1dan:20220115075220p:plain

すると以下のように UI が変わることが分かります。

DEV_BUILD あり DEV_BUILD なし
f:id:you1dan:20220115075404p:plain f:id:you1dan:20220115075415p:plain

一応ボタンの配置に関するコードも見ておきます。

void FAuthDialogs::UpdateLoginMethodButtons(DialogPtr LoginDialog)
{
    const Vector2 ParentPos = ParentDialog->GetPosition();
    const Vector2 ParentSize = ParentDialog->GetSize();

    const float PosX = 0.f;
    const float PosY = 140.f;
    const float SpX = 5.f; // spacing between each button

    const float NumLoginMethods = float(LoginMethods.size());

    const float SizeX = (ParentDialog->GetSize().x - ((NumLoginMethods + 1) * SpX)) / NumLoginMethods;
    const Vector2 Size = Vector2(SizeX, 25.f);

    const float FirstButtonPosX = PosX + SpX;
    const size_t WidgetIndexOffset = 6;

    for (size_t MethodIndex = 0; MethodIndex < LoginMethods.size(); ++MethodIndex)
    {
        const float ButtonPosX = FirstButtonPosX + (SizeX + SpX) * MethodIndex;
        WidgetPtr MethodButton = LoginDialog->GetWidget(WidgetIndexOffset + MethodIndex);
        if (MethodButton)
        {
            MethodButton->SetSize(Size);
            MethodButton->SetPosition(Vector2(ButtonPosX, PosY) + ParentPos);
        }
    }
}

前回、AuthDialogFriendsDialog を親にして配置していると書きましたが、 ParentDialog (実際には FriendsDialog) に対してサイズや配置が計算されていることが分かります。

Account Portal の処理を見る

以前の記事 で書きましたが Account Portal は、ブラウザでアカウントとの連携の許可をします。

FAuthDialogs::CreateLoginAccountPortalDialog

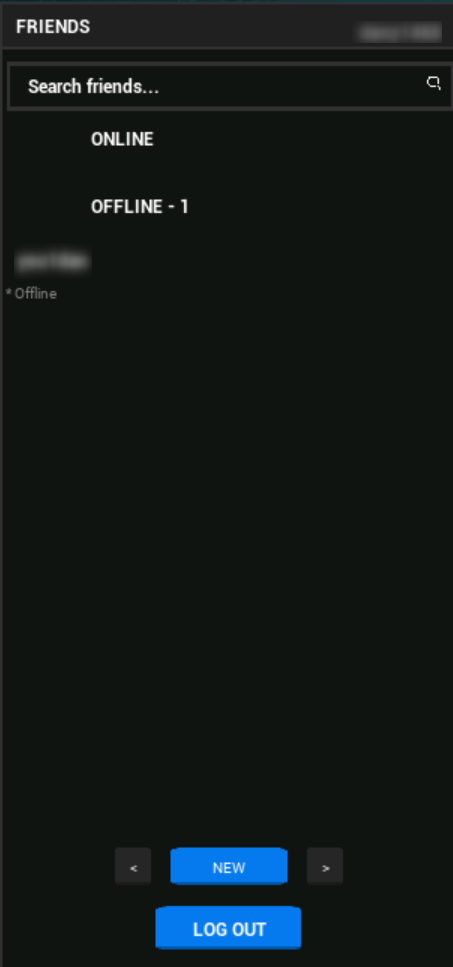
まずは Account Portal での UI 要素の作成部分を見ていきます。UI については、以下のようなモードがあります。

ログイン前 ログイン後 ログイン後に NEW をクリック
f:id:you1dan:20220115083244p:plain f:id:you1dan:20220115083637p:plain f:id:you1dan:20220115083649p:plain
void FAuthDialogs::CreateLoginAccountPortalDialog()
{
    LoginAccountPortalDialog = std::make_shared<FDialog>(Vector2(50, 50), Vector2(650, 700), ParentDialog->GetLayer() - 1);

    float PosX = 20.f;

    std::shared_ptr<FTextLabelWidget> LoginLabel = std::make_shared<FTextLabelWidget>(
        Vector2(PosX + 40.f, 10.f),
        Vector2(170.f, 30.f),
        LoginAccountPortalDialog->GetLayer() - 1,
        L"Log in to access " + LoginText + L".",
        L"");
    LoginLabel->Create();
    LoginLabel->SetFont(BoldSmallFont);

    std::shared_ptr<FTextLabelWidget> AuthLabel = std::make_shared<FTextLabelWidget>(
        Vector2(PosX - 50.f, 50.f),
        Vector2(70.f, 30.f),
        LoginAccountPortalDialog->GetLayer() - 1,
        L"Account Portal",
        L"");
    AuthLabel->Create();
    AuthLabel->SetFont(BoldSmallFont);

    std::shared_ptr<FTextLabelWidget> AuthLabel2 = std::make_shared<FTextLabelWidget>(
        Vector2(PosX - 50.f, 70.f),
        Vector2(180.f, 30.f),
        LoginAccountPortalDialog->GetLayer() - 1,
        L"You will be taken to the account portal.",
        L"");
    AuthLabel2->Create();
    AuthLabel2->SetFont(TinyFont);

    std::shared_ptr<FTextLabelWidget> AuthLabel3 = std::make_shared<FTextLabelWidget>(
        Vector2(PosX - 50.f, 70.f),
        Vector2(100.f, 30.f),
        LoginDeviceCodeDialog->GetLayer() - 1,
        L"",
        L"");
    AuthLabel3->Create();
    AuthLabel3->SetFont(TinyFont);

    std::shared_ptr<FButtonWidget> AuthButton = std::make_shared<FButtonWidget>(
        Vector2(PosX, 170.f),
        Vector2(100.f, 30.f),
        LoginAccountPortalDialog->GetLayer() - 1,
        L"LOG IN",
        assets::DefaultButtonAssets,
        BoldSmallFont,
        AuthButtonBackCol);
    AuthButton->Create();
    AuthButton->SetOnPressedCallback([this]()
    {
        if (IsDialogReadyForInput())
        {
            FGameEvent Event(EGameEventType::StartUserLogin, (int)ELoginMode::AccountPortal, L"", L"");
            FGame::Get().OnGameEvent(Event);
        }
    });
    AuthButton->SetBackgroundColors(assets::DefaultButtonColors);

    std::shared_ptr<FButtonWidget> CancelButton = std::make_shared<FButtonWidget>(
        Vector2(0.f, 40.f),
        Vector2(80.f, 25.f),
        LoginAccountPortalDialog->GetLayer() - 1,
        L"CANCEL",
        assets::DefaultButtonAssets,
        SmallFont,
        AuthButtonBackCol);
    CancelButton->Create();
    CancelButton->SetOnPressedCallback([this]()
    {
        if (IsDialogReadyForInput())
        {
            FGameEvent Event(EGameEventType::CancelLogin);
            FGame::Get().OnGameEvent(Event);
        }
    });
    CancelButton->SetBackgroundColors(assets::DefaultButtonColors);

    LoginAccountPortalDialog->AddWidget(LoginLabel);
    LoginAccountPortalDialog->AddWidget(AuthLabel);
    LoginAccountPortalDialog->AddWidget(AuthLabel2);
    LoginAccountPortalDialog->AddWidget(AuthLabel3);
    LoginAccountPortalDialog->AddWidget(AuthButton);
    LoginAccountPortalDialog->AddWidget(CancelButton);

    CreateLoginMethodWidgets(LoginAccountPortalDialog, ELoginMode::AccountPortal, PosX);

    AddDialog(LoginAccountPortalDialog);
}

なんとなく UI に沿った要素が配置されているのが確認できます。一方で LOG OUTNEW などのログイン後の要素がいくつか見当たりません。
ここに関しては、ログインメソッドに依らない要素として別途定義されています。ここでは一旦省きます。

AuthButton->SetOnPressedCallback

どうやらこれが LOG IN ボタンをクリックした際の Callback のようです。

AuthButton->SetOnPressedCallback([this]()
{
    if (IsDialogReadyForInput())
    {
        FGameEvent Event(EGameEventType::StartUserLogin, (int)ELoginMode::AccountPortal, L"", L"");
        FGame::Get().OnGameEvent(Event);
    }
});

IsDialogReadyForInput に関しては ShowDialog 後に入力可能状態になっているかというものです。

では、続いて FGame::OnGameEvent です。

FGame::OnGameEvent

2つのメソッドを呼び出しているようです。

void FGame::OnGameEvent(const FGameEvent& Event)
{
    CustomInvites->OnGameEvent(Event);
    FBaseGame::OnGameEvent(Event);
}

FCustomInvites::OnGameEvent

今回のイベントに合致するものはありません。

void FCustomInvites::OnGameEvent(const FGameEvent& Event)
{
    if (Event.GetType() == EGameEventType::UserLoggedIn)
    {
        // 略
    }
    else if (Event.GetType() == EGameEventType::UserLoggedOut)
    {
        // 略
    }
    else if (Event.GetType() == EGameEventType::UserConnectLoggedIn)
    {
        // 略
    }
    else if (Event.GetType() == EGameEventType::ShowPrevUser)
    {
        // 略
    }
    else if (Event.GetType() == EGameEventType::ShowNextUser)
    {
        // 略
    }
    else if (Event.GetType() == EGameEventType::CancelLogin)
    {
    }
}

FBaseGame::OnGameEvent

かなり多くの箇所にイベントを伝搬しています。

void FBaseGame::OnGameEvent(const FGameEvent& Event)
{
    PlayerManager->OnGameEvent(Event);
    Friends->OnGameEvent(Event);
    Menu->OnGameEvent(Event);
    Authentication->OnGameEvent(Event);
    Metrics->OnGameEvent(Event);
    Level->OnGameEvent(Event);
    EosUI->OnGameEvent(Event);
}

上記のうち、今回の StartUserLogin イベントが処理されるのは MenuAuthentication だけでした。

FBaseMenu::OnGameEvent

void FBaseMenu::OnGameEvent(const FGameEvent& Event)
{
    if (Event.GetType() == EGameEventType::ShowPrevUser)
    {
        // 略
    }
    else if (Event.GetType() == EGameEventType::ShowNextUser)
    {
        // 略
    }
    else if (Event.GetType() == EGameEventType::CancelLogin)
    {
        // 略
    }
    else if (Event.GetType() == EGameEventType::ToggleFPS)
    {
        // 略
    }
    else if (Event.GetType() == EGameEventType::ExitGame)
    {
        // 略
    }
    else if (Event.GetType() == EGameEventType::ShowPopupDialog)
    {
        // 略
    }

    if (FriendsDialog) FriendsDialog->OnGameEvent(Event);

    if (AuthDialogs) AuthDialogs->OnGameEvent(Event);
}

上記のうち AuthDialogs のみが StartUserLogin を受け付けます。

void FAuthDialogs::OnGameEvent(const FGameEvent& Event)
{
    if (Event.GetType() == EGameEventType::StartUserLogin)
    {
        EnableLoginButtons(false);
        EnableLoginMethodButtons(false);
    }

    // 略
}

上記はいずれも LOG IN ボタンや、各ログインメソッドのボタンを disable にするだけです。

FAuthentication::OnGameEvent

void FAuthentication::OnGameEvent(const FGameEvent& Event)
{
    if (Event.GetType() == EGameEventType::CheckAutoLogin)
    {
        // 略
    }
    else if (Event.GetType() == EGameEventType::StartUserLogin)
    {
        ELoginMode LoginMode = (ELoginMode)Event.GetFirstExtendedType();
        ELoginExternalType LoginExternalType = (ELoginExternalType)Event.GetSecondExtendedType();
        if (!Login(LoginMode, Event.GetFirstStr(), Event.GetSecondStr(), LoginExternalType))
        {
            FGameEvent LoginFailedEvent(EGameEventType::UserLoginFailed, Event.GetUserId());
            FGame::Get().OnGameEvent(LoginFailedEvent);
        }
    }
    // 略

処理中の FGameEvent は以下です。GameEvent のコンストラクタとの対応も記載します。

FGameEvent Event(EGameEventType::StartUserLogin, (int)ELoginMode::AccountPortal, L"", L"");

// FGameEvent
explicit FGameEvent(EGameEventType InType, int InFirstExtendedType, std::wstring InFirstStr, std::wstring InSecondStr) :
    Type(InType), FirstExtendedType(InFirstExtendedType), FirstStr(InFirstStr), SecondStr(InSecondStr)
{}

よって、Login メソッドの引数は以下のようになります。

Login((int)ELoginMode::AccountPortal, L"", L"", 0)

続いて、いよいよ Login です。

FAuthentication::Login

bool FAuthentication::Login(ELoginMode LoginMode, std::wstring FirstStr, std::wstring SecondStr, ELoginExternalType ExternalType)
{
    if (!FPlatform::IsInitialized()) return false;

    AuthHandle = EOS_Platform_GetAuthInterface(FPlatform::GetPlatformHandle());
    assert(AuthHandle != nullptr);

    ConnectHandle = EOS_Platform_GetConnectInterface(FPlatform::GetPlatformHandle());
    assert(ConnectHandle != nullptr);

    AddNotifyLoginStatusChanged();

    EOS_Auth_Credentials Credentials = {};
    Credentials.ApiVersion = EOS_AUTH_CREDENTIALS_API_LATEST;

    EOS_Auth_LoginOptions LoginOptions;
    memset(&LoginOptions, 0, sizeof(LoginOptions));
    LoginOptions.ApiVersion = EOS_AUTH_LOGIN_API_LATEST;

    if (FCommandLine::Get().HasParam(CommandLineConstants::ScopesNoFlags))
    {
        // 通らないため略
    }
    else if (FCommandLine::Get().HasParam(CommandLineConstants::ScopesBasicProfile) ||
             FCommandLine::Get().HasParam(CommandLineConstants::ScopesFriendsList) ||
             FCommandLine::Get().HasParam(CommandLineConstants::ScopesPresence) ||
             FCommandLine::Get().HasParam(CommandLineConstants::ScopesFriendsManagement) ||
             FCommandLine::Get().HasParam(CommandLineConstants::ScopesEmail))
    {
        // 通らないため略
    }
    else
    {
        LoginOptions.ScopeFlags = EOS_EAuthScopeFlags::EOS_AS_BasicProfile | EOS_EAuthScopeFlags::EOS_AS_FriendsList | EOS_EAuthScopeFlags::EOS_AS_Presence;
    }

    static char FirstParamStr[256];
    if (FirstStr.size() > sizeof(FirstParamStr) - 1) return false;
    sprintf_s(FirstParamStr, sizeof(FirstParamStr), "%s", FStringUtils::Narrow(FirstStr).c_str());

    static char SecondParamStr[256];
    if (SecondStr.size() > sizeof(SecondParamStr) - 1) return false;
    sprintf_s(SecondParamStr, sizeof(SecondParamStr), "%s", FStringUtils::Narrow(SecondStr).c_str());

    switch (LoginMode)
    {
        case ELoginMode::IDPassword:
        {
            // 通らないため略
            break;
        }
        case ELoginMode::ExchangeCode:
        {
            // 通らないため略
            break;
        }
        case ELoginMode::DeviceCode:
        {
            // 通らないため略
            break;
        }
        case ELoginMode::DevAuth:
        {
            // 通らないため略
            break;
        }
        case ELoginMode::AccountPortal:
        {
            FDebugLog::Log(L"[EOS SDK] Logging In with Account Portal");
            Credentials.Type = EOS_ELoginCredentialType::EOS_LCT_AccountPortal;
            break;
        }
        case ELoginMode::PersistentAuth:
        {
            // 通らないため略
            break;
        }
        case ELoginMode::ExternalAuth:
        {
            // 通らないため略
            break;
        }
    }

    LoginOptions.Credentials = &Credentials;

    CurrentLoginMode = LoginMode;

    EOS_Auth_Login(AuthHandle, &LoginOptions, this, LoginCompleteCallbackFn);

    AddConnectAuthExpirationNotification();

    return true;
}

ざっとした流れとしては、最後の EOS_Auth_Login を呼び出すための情報を構築している感じです。

ConnetHandle このメソッド内では使っていないのですが、クラス内では利用している箇所もあるため、そのためだと思います。

EOS_Auth_Login で Auth 用の URL の作成及び、ブラウザの起動まで行っていると推測されます。
ドキュメントには以下が記載されており、成功失敗に関わらずコールバックの実行を保証するとなっています。

This function is asynchronous; the EOS SDK guarantees that your callback (the CompletionDelegate parameter) will run when the operation completes, regardless of whether it succeeds or fails. Use the void* parameter to pass any contextual information the callback may need in order to react properly. Relevant information can be copied from the EOS SDK's cache while the callback function is running. You do not need to remove the callback function.

ではコールバックを見ていきます。

FAuthentication::LoginCompleteCallbackFn

void EOS_CALL FAuthentication::LoginCompleteCallbackFn(const EOS_Auth_LoginCallbackInfo* Data)
{
    FAuthentication* ThisAuth = NULL;
    if (Data->ClientData)
    {
        ThisAuth = (FAuthentication*)Data->ClientData;
        if (ThisAuth)
        {
            FDebugLog::Log(L" - Login Mode: %d", ThisAuth->CurrentLoginMode);
        }
    }

    EOS_HAuth AuthHandle = EOS_Platform_GetAuthInterface(FPlatform::GetPlatformHandle());
    assert(AuthHandle != nullptr);

    if (Data->ResultCode == EOS_EResult::EOS_Success)
    {
        const int32_t AccountsCount = EOS_Auth_GetLoggedInAccountsCount(AuthHandle);
        for (int32_t AccountIdx = 0; AccountIdx < AccountsCount; ++AccountIdx)
        {
            FEpicAccountId AccountId;
            AccountId = EOS_Auth_GetLoggedInAccountByIndex(AuthHandle, AccountIdx);

            EOS_ELoginStatus LoginStatus;
            LoginStatus = EOS_Auth_GetLoginStatus(AuthHandle, Data->LocalUserId);

            FDebugLog::Log(L"[EOS SDK] [%d] - Account ID: %ls, Status: %d", AccountIdx, FEpicAccountId(AccountId).ToString().c_str(), (int32_t)LoginStatus);
        }

        FGameEvent Event(EGameEventType::UserLoggedIn, Data->LocalUserId);
        FGame::Get().OnGameEvent(Event);
    }
    else if (Data->ResultCode == EOS_EResult::EOS_Auth_PinGrantCode)
    {
        // 今回は略
    }
    else if (Data->ResultCode == EOS_EResult::EOS_Auth_MFARequired)
    {
        // 今回は略
    }
    else if (Data->ResultCode == EOS_EResult::EOS_InvalidUser)
    {
        // 今回は略
    }
    else if (Data->ResultCode == EOS_EResult::EOS_Auth_AccountFeatureRestricted)
    {
        // 今回は略
    }
    else if (EOS_EResult_IsOperationComplete(Data->ResultCode))
    {
        // 今回は略
    }
}

ここでは成功時、つまり EOS_Success を受け取った場合のみ確認します。
といいつつ、成功時は AuthHandle を使って、アカウント情報を取得しているだけですね。複数のユーザーでログインしている場合も扱えるようですね。

成功時にはさらに UserLoggedInFGameEvent を発行していますが、今回はこれ以上はいきません。

どのようにログイン状態を確認しているか

Callback を登録したのち、EOS SDK はどのようにログイン状態を確認しているか気になりましたが、ログの方には polling と出ていました。

[2022.01.15-00.34.18:014] [EOS SDK] LogEOSAuth: FInitiateDeviceFlowTask Success
[2022.01.15-00.34.18:015] [EOS SDK] LogEOSAuth: Device code flow to be continued at
     https://www.epicgames.com/activate?userCode=xxx
[2022.01.15-00.34.18:032] [EOS SDK] LogEOSAuth: Launching platform browser for account portal
[2022.01.15-00.34.18:300] [EOS SDK] LogEOS: Error response received from backend. ServiceName=[OAuth],
     OperationName=[TokenGrant], Url=[<Redacted>], HttpStatus=[400],
     ErrorCode=[errors.com.epicgames.account.oauth.authorization_pending], NumericErrorCode=[1012],
     ErrorMessage=[The authorization server request is still pending as the end user has yet to visit and enter
     the verification code.],
     CorrId=[EOS-xxx]
[2022.01.15-00.34.18:300] [EOS SDK] LogEOSAuth: Polling for token grant. Device code flow to be continued at
     https://www.epicgames.com/activate?userCode=xxx
[2022.01.15-00.34.18:301] [EOS SDK] LogEOSAnalytics: Record Event: EOSSDK.HTTP.Complete <Redacted>
[2022.01.15-00.34.28:314] [EOS SDK] LogEOSAuth: Next token grant poll
[2022.01.15-00.34.28:531] [EOS SDK] LogEOS: Error response received from backend. ServiceName=[OAuth],
     OperationName=[TokenGrant], Url=[<Redacted>], HttpStatus=[400],
     ErrorCode=[errors.com.epicgames.account.oauth.authorization_pending], NumericErrorCode=[1012],
     ErrorMessage=[The authorization server request is still pending as the end user has yet to visit and enter
     the verification code.],
     CorrId=[EOS-xxx]
[2022.01.15-00.34.28:532] [EOS SDK] LogEOSAuth: Polling for token grant. Device code flow to be continued at
     https://www.epicgames.com/activate?userCode=xxx
[2022.01.15-00.34.28:532] [EOS SDK] LogEOSAnalytics: Record Event: EOSSDK.HTTP.Complete <Redacted>
[2022.01.15-00.34.38:547] [EOS SDK] LogEOSAuth: Next token grant poll
[2022.01.15-00.34.38:831] [EOS SDK] LogEOSAuth: FPollTokenGrantRequestTask Success
[2022.01.15-00.34.38:831] [EOS SDK] LogEOSAnalytics: Record Event: EOSSDK.HTTP.Complete <Redacted>
[2022.01.15-00.34.38:847] [EOS SDK] LogEOSAuth: FInitiateDeviceFlowTask Complete Success
[2022.01.15-00.34.38:848] [EOS SDK] LogEOSAuth: NewUserToken: User ClientId: xyz...OaC AccountId: f87...b29
     Access[Expires: 2022.01.15-02.34.41 Remaining: 7200.13] Refresh[Expires: 2022-07-14T00:34:41.128Z
     Remaining: 15552000.13] State: Valid

polling のコードまでは追えていませんが、 EOS_Platform_Tick が EOS SDK のループとして利用されていそうです。

先にイベントハンドルの方を見たので main 関数のイベントループの Main->Tick 部分を見ていなかったのですが、EOS_Platform_Tick はそこで呼び出されています。(内部的には FMain::Update -> FGame::Update -> FPlatform::Update の先なのですが)

まとめ

今回は AuthDialog の UI の確認から、Account Portal を使ったログイン方法の流れをざっと確認しました。

サンプルコードの読み方すらもわからなかったので時間をかけて見ていきましたが、これでようやく他のサンプルも多少見ていけそうな気がします。

参考にさせていただいた記事

Epic Online Services サンプルの AuthAndFriends のコードリーディング ④

今回は UI の構成要素を見ていきたいと思います。
前回FMenu には親クラスも合わせて以下の Dialog が含まれていることが分かりました。

  • ConsoleDialog
  • FriendsDialog
  • ExitDialog (非表示)
  • PopupDialog (非表示)
  • CustomInvitesDialog
  • AuthDialog

FMenu::UpdateLayout

// custom invite / console frame
#define CUSTOMINVITE_CONSOLE_FRAME_WIDTH   .7f
#define CUSTOMINVITE_CONSOLE_FRAME_HEIGHT  1.f
#define CUSTOMINVITE_CONSOLE_FRAME_SCALE   Vector2(CUSTOMINVITE_CONSOLE_FRAME_WIDTH, CUSTOMINVITE_CONSOLE_FRAME_HEIGHT)

// friends frame
#define FRIENDS_FRAME_WIDTH                    1.f - CUSTOMINVITE_CONSOLE_FRAME_WIDTH
#define FRIENDS_FRAME_HEIGHT               1.f
#define FRIENDS_FRAME_SCALE                    Vector2(FRIENDS_FRAME_WIDTH, FRIENDS_FRAME_HEIGHT)

// custom invite dialog (inside custom invite / console frame)
#define CUSTOMINVITES_DIALOG_PERCENT_X     1.f
#define CUSTOMINVITES_DIALOG_PERCENT_Y     .2f
#define CUSTOMINVITE_DIALOG_SCALE          Vector2(CUSTOMINVITES_DIALOG_PERCENT_X, CUSTOMINVITES_DIALOG_PERCENT_Y)

// console dialog (inside custom invite / console frame)
#define CONSOLE_DIALOG_PERCENT_X           1.f
#define CONSOLE_DIALOG_PERCENT_Y           1.f - CUSTOMINVITES_DIALOG_PERCENT_Y
#define CONSOLE_DIALOG_SCALE               Vector2(CONSOLE_DIALOG_PERCENT_X, CONSOLE_DIALOG_PERCENT_Y)

// freinds dialog (inside friends frame)
#define FRIENDS_USAGE_PERCENT_X                1.f
#define FRIENDS_USAGE_PERCENT_Y                1.f
#define FRIENDS_DIALOG_SCALE               Vector2(FRIENDS_USAGE_PERCENT_X, FRIENDS_USAGE_PERCENT_Y)

void FMenu::UpdateLayout(int Width, int Height)
{
    WindowSize = Vector2((float)Width, (float)Height);
    Vector2 LayoutPositionMarker{ };

    BackgroundImage->SetPosition(LayoutPositionMarker);
    BackgroundImage->SetSize(Vector2((float)Width, ((float)Height) / 2.f));

    // move the layout cursor down 10px, recalculate available percentage
    LayoutPositionMarker += Vector2(10.f, 120.f);
    const Vector2 MainFrameOrigin{ LayoutPositionMarker };
    const Vector2 MainFrameSize{ WindowSize - MainFrameOrigin };

    const Vector2 CustomInviteConsoleFrameOrigin{ MainFrameOrigin };
    const Vector2 CustomInviteConsoleFrameSize{ Vector2::CoeffProduct(CUSTOMINVITE_CONSOLE_FRAME_SCALE, MainFrameSize) };

    const Vector2 CustomInviteDialogSize = Vector2::CoeffProduct(CUSTOMINVITE_DIALOG_SCALE, CustomInviteConsoleFrameSize);
    if (CustomInvitesDialog)
    {
        CustomInvitesDialog->SetSize(CustomInviteDialogSize);
        CustomInvitesDialog->SetPosition(CustomInviteConsoleFrameOrigin);
    }
    LayoutPositionMarker.y += CustomInviteDialogSize.y;

    const Vector2 ConsoleWidgetSize = Vector2::CoeffProduct(CONSOLE_DIALOG_SCALE, CustomInviteConsoleFrameSize);
    if (ConsoleDialog)
    {
        ConsoleDialog->SetSize(ConsoleWidgetSize);
        ConsoleDialog->SetPosition(LayoutPositionMarker);
    }

    LayoutPositionMarker = MainFrameOrigin;
    LayoutPositionMarker.x += CustomInviteConsoleFrameSize.x;

    const Vector2 FriendsFrameOrigin{ LayoutPositionMarker };
    const Vector2 FriendsFrameSize = Vector2::CoeffProduct(FRIENDS_FRAME_SCALE, MainFrameSize);

    const Vector2 FriendsWidgetSize = Vector2::CoeffProduct(FRIENDS_DIALOG_SCALE, FriendsFrameSize);
    if (FriendsDialog)
    {
        FriendsDialog->SetPosition(LayoutPositionMarker);
        FriendsDialog->SetSize(FriendsWidgetSize);
    }

    if (PopupDialog)
    {
        PopupDialog->SetPosition(Vector2((WindowSize.x / 2.f) - PopupDialog->GetSize().x / 2.0f, (WindowSize.y / 2.f) - PopupDialog->GetSize().y));
    }

    if (ExitDialog)
    {
        ExitDialog->SetPosition(Vector2((WindowSize.x / 2.f) - ExitDialog->GetSize().x / 2.0f, (WindowSize.y / 2.f) - ExitDialog->GetSize().y - 200.0f));
    }

    if (AuthDialogs)
    {
        AuthDialogs->UpdateLayout();
    }
}

順番に見ていきます。

WindowSize = Vector2((float)Width, (float)Height);
Vector2 LayoutPositionMarker{ };

引数から得られた WidthHeightWindowSize に入れています。おそらくそのままの意味だと思います。
LayoutPositionMarker を初期化しています。このベクトルに、各 Dialog の配置のベース情報を更新していくようです。

BackgroundImage->SetPosition(LayoutPositionMarker);
BackgroundImage->SetSize(Vector2((float)Width, ((float)Height) / 2.f));

BackgroundImageDialog ではないのでここまでで紹介していませんが FBaseMenu のコンストラクタで以下のように初期化されます。

BackgroundImage = std::make_shared<FSpriteWidget>(Vector2(0.f, 0.f), Vector2(1024.f, 384.f), DefaultLayer, L"Assets/menu_background.dds");

画像としては以下の部分になります。 FSpriteWidget のコンストラクタの第一引数は「位置」であり、第二引数は「サイズ」なので、この背景画像は (0,0) の位置に配置され、幅 1024px, 高さ 384px ということになります。ただ、以下のアプリケーションの画像部分はそこまでの高さはありません。あくまでこの Widget のサイズです。

f:id:you1dan:20220114212456p:plain

ちなみに、BackgroundImage に対して SetPositionSetSize をしていますが、他にもタイトルラベル等もあり、それらもある程度 BackgroundImage が (0,0) に配置される前提でハードコードされているようです。(Window サイズも最小サイズが 1024x768 になっています)

// move the layout cursor down 10px, recalculate available percentage
LayoutPositionMarker += Vector2(10.f, 120.f);
const Vector2 MainFrameOrigin{ LayoutPositionMarker };
const Vector2 MainFrameSize{ WindowSize - MainFrameOrigin };

続いて MainFrame ですが、これは MainFrame というものが存在しているわけではなく BackgroundImage エリアとの区別のために存在しているようです。配置としては、 LayoutPositionMarker はこの直前で (0, 0) なので、ここ MainFrameOrigin は (10, 120) を起点としていることになります。

f:id:you1dan:20220114214055p:plain

上図のように、以降の常時表示される要素は MainFrame から計算されることになります。

const Vector2 CustomInviteConsoleFrameOrigin{ MainFrameOrigin };
const Vector2 CustomInviteConsoleFrameSize{ Vector2::CoeffProduct(CUSTOMINVITE_CONSOLE_FRAME_SCALE, MainFrameSize) };

const Vector2 CustomInviteDialogSize = Vector2::CoeffProduct(CUSTOMINVITE_DIALOG_SCALE, CustomInviteConsoleFrameSize);
if (CustomInvitesDialog)
{
    CustomInvitesDialog->SetSize(CustomInviteDialogSize);
    CustomInvitesDialog->SetPosition(CustomInviteConsoleFrameOrigin);
}
LayoutPositionMarker.y += CustomInviteDialogSize.y;

Vector2::CoeffProduct は成分ごとの積です。

#define CUSTOMINVITE_CONSOLE_FRAME_WIDTH    .7f
#define CUSTOMINVITE_CONSOLE_FRAME_HEIGHT  1.f
#define CUSTOMINVITE_CONSOLE_FRAME_SCALE   Vector2(CUSTOMINVITE_CONSOLE_FRAME_WIDTH, CUSTOMINVITE_CONSOLE_FRAME_HEIGHT)

// custom invite dialog (inside custom invite / console frame)
#define CUSTOMINVITES_DIALOG_PERCENT_X     1.f
#define CUSTOMINVITES_DIALOG_PERCENT_Y     .2f
#define CUSTOMINVITE_DIALOG_SCALE          Vector2(CUSTOMINVITES_DIALOG_PERCENT_X, CUSTOMINVITES_DIALOG_PERCENT_Y)

CustomInviteConsoleFrame は、CustomInviteDialog とこの後で出てくる ConsoleDialog の両方の領域です。
そのサイズは高さは MainFrame と同じ、幅は 0.7 倍されています。以下のような領域ですね。

続いて CustomInviteDialogCustomInviteConsoleFrame に対して幅は同じ、高さは 0.2 倍となっています。
まとめると以下のような感じです。

f:id:you1dan:20220114215747p:plain

LayoutPositionMarker.y += CustomInviteDialogSize.y; 最後に、LayoutPositionMarker の Y 座標を CustomInviteDialog のそれで更新しています。

const Vector2 ConsoleWidgetSize = Vector2::CoeffProduct(CONSOLE_DIALOG_SCALE, CustomInviteConsoleFrameSize);
if (ConsoleDialog)
{
    ConsoleDialog->SetSize(ConsoleWidgetSize);
    ConsoleDialog->SetPosition(LayoutPositionMarker);
}

LayoutPositionMarker = MainFrameOrigin;
LayoutPositionMarker.x += CustomInviteConsoleFrameSize.x;
// console dialog (inside custom invite / console frame)
#define CONSOLE_DIALOG_PERCENT_X           1.f
#define CONSOLE_DIALOG_PERCENT_Y           1.f - CUSTOMINVITES_DIALOG_PERCENT_Y
#define CONSOLE_DIALOG_SCALE               Vector2(CONSOLE_DIALOG_PERCENT_X, CONSOLE_DIALOG_PERCENT_Y)

続いて、ConsoleDialog ですが、先程の内容からの延長ですが、 CustomInviteConsoleFrame に対して、幅は同じですが、高さが CustomInviteDialog と分割するような指定になっています。

注意すべきは、 LayoutPositionMarker の値が、 MainFrame の Y 座標、CustomInviteConsoleFrame の X 座標になっています。

f:id:you1dan:20220114220314p:plain

const Vector2 FriendsFrameOrigin{ LayoutPositionMarker };
const Vector2 FriendsFrameSize = Vector2::CoeffProduct(FRIENDS_FRAME_SCALE, MainFrameSize);

const Vector2 FriendsWidgetSize = Vector2::CoeffProduct(FRIENDS_DIALOG_SCALE, FriendsFrameSize);
if (FriendsDialog)
{
    FriendsDialog->SetPosition(LayoutPositionMarker);
    FriendsDialog->SetSize(FriendsWidgetSize);
}
// friends frame
#define FRIENDS_FRAME_WIDTH                    1.f - CUSTOMINVITE_CONSOLE_FRAME_WIDTH
#define FRIENDS_FRAME_HEIGHT               1.f
#define FRIENDS_FRAME_SCALE                    Vector2(FRIENDS_FRAME_WIDTH, FRIENDS_FRAME_HEIGHT)

// freinds dialog (inside friends frame)
#define FRIENDS_USAGE_PERCENT_X                1.f
#define FRIENDS_USAGE_PERCENT_Y                1.f
#define FRIENDS_DIALOG_SCALE               Vector2(FRIENDS_USAGE_PERCENT_X, FRIENDS_USAGE_PERCENT_Y)

続いて FriendsFrameFriendsDialog です。
FriendsDialogFriendsFrame に対して幅、高さともに等倍なので同じサイズです。
FriendsFrameMainFrame に対して CustomeInviteConsoleFrame と幅を分け合う形になっています。

上述の通り、 LayoutPositionMarkerCustomInviteConsoleFrame の右上端に移動しているので、そこから配置されることになります。

if (PopupDialog)
{
    PopupDialog->SetPosition(Vector2((WindowSize.x / 2.f) - PopupDialog->GetSize().x / 2.0f, (WindowSize.y / 2.f) - PopupDialog->GetSize().y));
}

if (ExitDialog)
{
    ExitDialog->SetPosition(Vector2((WindowSize.x / 2.f) - ExitDialog->GetSize().x / 2.0f, (WindowSize.y / 2.f) - ExitDialog->GetSize().y - 200.0f));
}

PopupDialogExitDialog に関しては常時表示されているわけではなく、なにかの通知の場合に表示されます。なので、それぞれ、WindowSize に対して計算されています。

PopupDialog ExitDialog
f:id:you1dan:20220114221348p:plain f:id:you1dan:20220114221400p:plain

AuthDialog

if (AuthDialogs)
{
    AuthDialogs->UpdateLayout();
}

最後に AuthDialog ですが、見ての通りでこれだけ UpdateLayout が呼び出されています。

AuthDialog は前回も触れましたが FriendsDialog に依存しており、内部では ParentDialog として保持しています。
加えて、それに対して Depth も浅い部分に AuthDialog の UI 要素を描画しているため FriendsDialog 内に AuthDialog の内容が描画されることになります。

まとめ

サンプルアプリケーションの UI 要素について、どのように配置されているかをざっと眺めました。

次は、今回のサンプルのメインの部分である AuthDialog の方に入っていければと思います。

Epic Online Services サンプルの AuthAndFriends のコードリーディング ③

今回からイベントループに入っていきますが、SDL2 を使った GUI プログラミングに不慣れなので少しずつ見ていきます。

イベントループ部分

int main(int Argc, char* Args[]) {
    // 略

        //Main loop flag
        bool bQuit = false;

        //Event handler
        SDL_Event Event;

        //Enable text input
        SDL_StartTextInput();

        //While application is running
        while (!bQuit)
        {
            //Handle events on queue
            while (SDL_PollEvent(&Event) != 0)
            {
                bQuit = ProcessSDLEvents(&Event);
            }

            Main->Tick();

            //Update screen
            SDL_GL_SwapWindow(Main->GetWindow());
        }

        //Disable text input
        SDL_StopTextInput();

上記は main のイベントループ部分のみ抜粋したものです。

ProcessSDLEvents メソッドがイベントハンドルをしているようです。

ProcessSDLEvents

bool ProcessSDLEvents(SDL_Event *Event)
{
    FUIEvent InputEvent = FInput::ProcessSDLEvent(*Event);
    if (InputEvent.GetType() != EUIEventType::None)
    {
        FGame::Get().GetMenu()->OnUIEvent(InputEvent);
    }
    else
    {
        switch (Event->type)
        {
            case SDL_QUIT:
            {
                return true;
            }
            case SDL_WINDOWEVENT:
            {
                ProcessWindowEvent(&Event->window);
                break;
            }
            default:
                break;
        }
    }

    return false;
}

FInput::ProcessSDLEvent

ここでは、 SDL_EventFUIEvent に変換しています。詳細は省略しますが、 FUIEvent は以下の種類があり、 SDL_Event の特定の操作イベントが割り当てられます。

enum class EUIEventType : unsigned char
{
    None,
    MousePressed,
    MouseReleased,
    MouseWheelScrolled,
    KeyPressed,
    KeyReleased,
    TextInput,
    CopyText,
    SelectAll,
    PasteText,
    FullscreenToggle,
    SearchText,
    FocusGained,
    FocusLost,
    FriendInviteSent,
    InviteToSession,
    Last = FriendInviteSent
};

else 部分

else 部分は QUIT か Window 操作時に関するものです。 QUIT の場合は true が返却され、イベントループを抜けるようになっています。

InputEvent が None 以外のとき

FGame::Get().GetMenu()->OnUIEvent(InputEvent) が呼び出されています。

前回見たとおりで FGame は多くのゲームの要素を管理しており、 GetMenu では FMenuインスタンスを取得します。

FMenu::OnUIEvent

実際には親クラスである FBaseMenu::OnUIEvent が呼び出されます。

void FBaseMenu::OnUIEvent(const FUIEvent& Event)
{
#ifdef EOS_DEMO_SDL
    // FullScreenToggle に関するコードがあるが省略
    else
#endif
    if (Event.GetType() == EUIEventType::MousePressed)
    {
        for (DialogPtr NextDialog : Dialogs)
        {
            if (NextDialog->CheckCollision(Event.GetVector()))
            {
                NextDialog->OnUIEvent(Event);
            }
            else
            {
                NextDialog->SetFocused(false);
            }
        }
    }
    else
    {
        for (DialogPtr NextDialog : Dialogs)
        {
            NextDialog->OnUIEvent(Event);
        }
    }

    if (AuthDialogs) AuthDialogs->OnUIEvent(Event);
}

Dialogs 配列の内部

FBaseMenu の内部では以下が Dialogs 配列に追加されています。

  • ConsoleDialog
  • FriendsDialog
  • ExitDialog (非表示)
  • PopupDialog (非表示)

また FMenu の内部では以下が追加されています。

  • CustomInvitesDialog

CheckCollision

NextDialog->CheckCollisionDialog::CheckCollision に実装されており、Dialog 内部の Widgets (UI 要素) の座標とマウスポイントの座標がオーバーラップしているかどうかを判定しています。

AuthDialogs

AuthDialogsDialogs 配列に入っていないことからも、少し特別な扱いになっています。

void FBaseMenu::CreateAuthDialogs()
{
    AuthDialogs = std::make_shared<FAuthDialogs>(
        FriendsDialog,
        L"Friends",
        BoldSmallFont->GetFont(),
        SmallFont->GetFont(),
        TinyFont->GetFont());
    
    AuthDialogs->Create();
}

AuthDialogs は生成時に FriendsDialog も受け取るようになっています。

void FBaseMenu::Create()
{
    BackgroundImage->Create();

    TitleLabel->Create();
    TitleLabel->SetFont(BoldLargeFont->GetFont());

    FPSLabel->Create();
    FPSLabel->SetFont(SmallFont->GetFont());

    CreateConsoleDialog();
    CreateAuthDialogs();
    CreateExitDialog();
    CreatePopupDialog();
}
void FMenu::Create()
{
    CreateFriendsDialog();

    // creates console dialog, which is needed for creating custom invites dialog
    FBaseMenu::Create();

    CreateCustomInvitesDialog();
}

上記のように、FriendsDialog だけは FMenu で生成され、その後 FBaseMenuAuthDialog を含む他の Dialog が生成されています。

まとめ

今日はイベントループに入り、イベントをまず受け取っている FMenu の構成要素を眺めました。

次は FMenu の構成要素がどのように UI にセットされているかなど見てみたいと思います。

Epic Online Services サンプルの AuthAndFriends のコードリーディング ②

前回SDLMain.cppmain 関数の SDL2 を軸にした簡単な流れだけ見ました。

int main(int Argc, char* Args[])
{
    // Ignore first param (executable path)
    std::vector<std::wstring> CmdLineParams;
    for (int i = 1; i < Argc; ++i)
    {
        CmdLineParams.push_back(FStringUtils::Widen(Args[i]));
    }
    FCommandLine::Get().Init(CmdLineParams);

    FSettings::Get().Init();

    Main = std::make_unique<FMain>();

    Main->InitPlatform();

上記は `main のイベントループに入る前のコードです。

コマンドライン引数を FCommandLine に格納、設定ファイルの指定があれば FSettings に格納しています。
どちらもシングルトンの実装がされていて Getインスタンスを取得できます。

参考: シングルトンのベターな実装方法 - Qiita

FMain

これが本体です。

コンストラクタ / デストラク

DirectX の部分を除けば以下のように小さなコードです。

FMain::FMain() noexcept(false):
    bIsFullScreen(false)
{
    FDebugLog::Init();
    FDebugLog::AddTarget(FDebugLog::ELogTarget::DebugOutput);
    FDebugLog::AddTarget(FDebugLog::ELogTarget::Console);
    FDebugLog::AddTarget(FDebugLog::ELogTarget::File);
}

FMain::~FMain()
{
    FDebugLog::Close();

    Game = nullptr;
}

bIsFullScreen, Game のメンバ変数定義は以下です。

public:
    /** True if main window is currently in fullscreen mode */
    bool bIsFullScreen;
private:
    std::unique_ptr<FGame> Game;

InitPlatform

以下のコードは全体ですがログ出力は省いています。

void FMain::InitPlatform()
{
    // Init EOS SDK
    EOS_InitializeOptions SDKOptions = {};
    SDKOptions.ApiVersion = EOS_INITIALIZE_API_LATEST;
    SDKOptions.AllocateMemoryFunction = nullptr;
    SDKOptions.ReallocateMemoryFunction = nullptr;
    SDKOptions.ReleaseMemoryFunction = nullptr;
    SDKOptions.ProductName = SampleConstants::GameName;
    SDKOptions.ProductVersion = "1.0";
    SDKOptions.Reserved = nullptr;
    SDKOptions.SystemInitializeOptions = nullptr;
    SDKOptions.OverrideThreadAffinity = nullptr;

    EOS_EResult InitResult = EOS_Initialize(&SDKOptions);
    if (InitResult != EOS_EResult::EOS_Success) return;

    EOS_EResult SetLogCallbackResult = EOS_Logging_SetCallback(&EOSSDKLoggingCallback);

    const bool bCreateSuccess = FPlatform::Create();
}

EOS_Initialize に関しては以下の説明がありますので、 EOS_Shutdown もここで追っておきます。

This function must only be called one time and must have a corresponding EOS_Shutdown call

EOS_Shutdown が呼ばれる箇所

main 関数において、メインループ終了後に Main->OnShutdown(); が呼び出されます。この内部でさらに Game->OnShutdown(); が呼び出されます。
Game のクラスである FGame の親クラスの FBaseGame::OnShutdown に処理が移譲されており、そこで Authentication->Shutdown(); が呼び出されます。
AuthenticationFAuthenticationインスタンスであり、その Shutdown メソッド内で EOS_Shutdown() が呼び出されています。

void FAuthentication::Shutdown()
{
    RemoveNotifyLoginStatusChanged();

    RemoveConnectAuthExpirationNotification();

    if (FPlatform::GetPlatformHandle())
    {
        EOS_Platform_Release(FPlatform::GetPlatformHandle());
    }

    EOS_EResult ShutdownResult = EOS_Shutdown();
    if (ShutdownResult != EOS_EResult::EOS_Success) // ログ

    FPlatform::Release();
}

ここの最後で呼び出されている FPlatformFMain::InitPlatform メソッド内でも FPlatform::Create が呼び出されており、シャットダウン処理はこの FAuthentication::Shutdown が担っているようです。

FPlatform

以下のコメントが書かれているため、EOS の Platform 関連にアクセスするようです。
Platform インターフェース | Epic Online Services ドキュメンテーション

/**
* Creates EOS SDK Platform
*/
class FPlatform
bool FPlatform::Create()
{
    bIsInit = false;

    // Create platform instance
    EOS_Platform_Options PlatformOptions = {};
    PlatformOptions.ApiVersion = EOS_PLATFORM_OPTIONS_API_LATEST;
    PlatformOptions.bIsServer = FCommandLine::Get().HasFlagParam(CommandLineConstants::Server);
    PlatformOptions.EncryptionKey = SampleConstants::EncryptionKey;
    PlatformOptions.OverrideCountryCode = nullptr;
    PlatformOptions.OverrideLocaleCode = nullptr;
    PlatformOptions.Flags = EOS_PF_WINDOWS_ENABLE_OVERLAY_D3D9 | EOS_PF_WINDOWS_ENABLE_OVERLAY_D3D10 | EOS_PF_WINDOWS_ENABLE_OVERLAY_OPENGL; // Enable overlay support for D3D9/10 and OpenGL. This sample uses D3D11 or SDL.
    PlatformOptions.CacheDirectory = FUtils::GetTempDirectory();

    // コマンドラインパラメータから ProductId を取得し設定
    // コマンドラインパラメータから SandboxId を取得し設定
    // コマンドラインパラメータから DeploymentId を取得し設定
    // コマンドラインパラメータから ClientId を取得し設定
    // コマンドラインパラメータから ClientSecret を取得し設定

    // (未設定など)不正な値があれば失敗
    if (bHasInvalidParamProductId ||
        bHasInvalidParamSandboxId ||
        bHasInvalidParamDeploymentId ||
        bHasInvalidParamClientCreds)
    {
        return false;
    }

    EOS_Platform_RTCOptions RtcOptions = { 0 };
    RtcOptions.ApiVersion = EOS_PLATFORM_RTCOPTIONS_API_LATEST;

    // 以下は Windows で SDL を利用している場合
    std::string XAudio29DllPath = SDL_GetBasePath();
    XAudio29DllPath.append("/xaudio2_9redist.dll");

    EOS_Windows_RTCOptions WindowsRtcOptions = { 0 };
    WindowsRtcOptions.ApiVersion = EOS_WINDOWS_RTCOPTIONS_API_LATEST;
    WindowsRtcOptions.XAudio29DllPath = XAudio29DllPath.c_str();
    RtcOptions.PlatformSpecificOptions = &WindowsRtcOptions;

    PlatformOptions.RTCOptions = &RtcOptions;

    PlatformHandle = EOS_Platform_Create(&PlatformOptions);

    if (PlatformHandle == nullptr) return true;

    bIsInit = true;

    return true;

期待通り EOS の Platform のインスタンスを作成し保持していることが確認できます。

EOS_Windows_RTCOptions に関してはドキュメントを見つけられませんでしたが、SDK にヘッダファイルは含まれていました。 EOS_Platform_RTCOptions::PlatformSpecificOptions に設定するものなので、Windows 用の設定ということなのだと思います。

ここでいう RTC はドキュメントから明示的になにかわからなかったのですが、WebRTC のことなのでしょうか。

EOS_Platform_Create のドキュメントには、これが single instance であることと、EOS_Platform_Release に渡して開放することが記載されています。
すでに FAuthentication::Shutdown() の中で EOS_Platform_Release(FPlatform::GetPlatformHandle()); が呼び出されていることを確認できています。

ついでに FPlatform::Release も見ておきます。

void FPlatform::Release()
{
    bIsInit = false;
    PlatformHandle = nullptr;
    bIsShuttingDown = true;
}

init 関数 (SDLMain.cpp)

続いてイベントループの直前の init 関数を見ます。

int main(int Argc, char* Args[]) {
    // Main->InitPlatform(); まで

    //Start up SDL and create window
    if (!Init())
    {
        printf("Failed to initialize!\n");
    }
    else
    { // ここからイベントループ

SDL2 の初期設定のコードが多いので、その辺は省略し、FMain クラスに関わる部分を中心にみていきます。

bool Init()
{
    // SDL_Init, SDL_GL_SetAttribute の設定

    int Width, Height;
    Main->GetDefaultSize(Width, Height);

    Main->InitCommandLine();

    SDL_Window* Window = nullptr;

    //Create window
    if (Main->bIsFullScreen) // Window = SDL_CreateWindow が分岐でそれぞれ実行

    //Create context
    SDL_GLContext GLContext = SDL_GL_CreateContext(Window);

    //Initialize GLEW
    glewExperimental = GL_TRUE;
    GLenum glewError = glewInit();

    //Vsync settings
    //First try to use adaptive VSync
    if (SDL_GL_SetSwapInterval(-1) < 0) // Vsync の設定を何度か行う

    //init True Type Fonts lib
    if (TTF_Init() != 0)

    if (!Main->bIsFullScreen)
    {
        int MinWidth = 1024;
        int MinHeight = 768;
        Main->GetMinimumSize(MinWidth, MinHeight);
        SDL_SetWindowMinimumSize(Window, MinWidth, MinHeight);
    }

    SDL_GetWindowSize(Window, &Width, &Height);

    //Initialize OpenGL
    if (!InitGraphics(Window, Width, Height)) return false;

    Main->Initialize(Window, GLContext, Width, Height);

    return true;
}

FMain::InitCommandLine

void FMain::InitCommandLine()
{
    bIsFullScreen = HasFullScreenCommandLine();
}

bool FMain::HasFullScreenCommandLine()
{
    return FCommandLine::Get().HasFlagParam(CommandLineConstants::Fullscreen);
}

コマンドライン引数から fullscreen を取得しているだけです。

FMain::Initialize

void FMain::Initialize(SDL_Window* Window, SDL_GLContext InGLContext, int Width, int Height)
{
    SDLWindow = Window;
    GLContext = InGLContext;

    Game = std::make_unique<FGame>();

    CreateDeviceDependentResources();
    CreateWindowSizeDependentResources();

    Game->UpdateLayout(Width, Height);
    Game->Init();
}

void FMain::CreateDeviceDependentResources()
{
    if (Game)
        Game->Create();
}

void FMain::CreateWindowSizeDependentResources()
{
    Vector2 Size;

    int Width = 0, Height = 0;
    SDL_GetWindowSize(SDLWindow, &Width, &Height);
    Size = Vector2(float(Width), float(Height));
    float aspectRatio = float(Size.x) / float(Size.y);
}

Window サイズに関する処理もしていますが、 Game インスタンスの作成・保持や初期化を行っています。

続いて Game のクラスである FGame を見ていきます。

FGame

コンストラクタ / デストラク

FGame::FGame() noexcept(false) :
    FBaseGame()
{
    Menu = std::make_shared<FMenu>(Console);
    Level = std::make_unique<FLevel>();
    CustomInvites = std::make_unique<FCustomInvites>();

    CreateConsoleCommands();
}

FGame::~FGame()
{
}

void FGame::CreateConsoleCommands()
{
    FBaseGame::CreateConsoleCommands();
    if (Console)
    {
        const std::vector<const wchar_t*> ExtraHelpMessageLines =
        {
            L" SIMULATECUSTOMINVITE - simulates an incoming custom invite, debug testing only",
        };
        AppendHelpMessageLines(ExtraHelpMessageLines);
    }
}

FGameFMenu, FLevel, FCustomInvites の管理をしているようです。
さらに ConsoleFConsoleshared_ptr のため、 FConsole の管理もしているようです。

続いて、親クラスの FBaseGame です。

FBaseGame のコンストラクタ / デストラク

FBaseGame::FBaseGame() noexcept(false):
    TheImpl(std::make_unique<FBaseGame::Impl>(this))
{
    Input = std::make_unique<FInput>();
    Console = std::make_shared<FConsole>();
    Users = std::make_unique<FUsers>();
    TextureManager = std::make_unique<FTextureManager>();
    Authentication = std::make_shared<FAuthentication>();
    Friends = std::make_unique<FFriends>();
    Metrics = std::make_unique<FMetrics>();
    PlayerManager = std::make_unique<FPlayerManager>();
    VectorRender = std::make_unique<FVectorRender>();
    EosUI = std::make_unique<FEosUI>();
}

FBaseGame::~FBaseGame()
{
}

親クラスもまとめて見ると、FGame は、ほとんどを管理しています。そりゃそうですよね😅

メンバ初期化で指定されている TheImplFBaseGame::Impl というクラスになっておりコメントを見るに singleton として動くようです。

FBaseGame::Create

Game->Create() も実態としては FBaseGame の方になっています。

void FBaseGame::Create()
{
    TheImpl->UISpriteBatch = std::make_unique<FSDLSpriteBatch>();

    Menu->CreateFonts();
    Menu->Create();
    Level->Create();
    VectorRender->Create();
}

構成要素の Create が順次呼び出されているようです。

UpdateLayout / Init

Game->UpdateLayout(), Game->Init() も同様に FBaseGame の方にあります。

void FBaseGame::UpdateLayout(int Width, int Height)
{
    if (VectorRender)
    {
        //recreate vector render
        bool bIsEnabled = VectorRender->IsDebugRenderEnabled();
        VectorRender = std::make_unique<FVectorRender>();
        VectorRender->Create();
        VectorRender->SetDebugRenderEnabled(bIsEnabled);
    }

    if (Menu)
    {
        Menu->UpdateLayout(Width, Height);
    }
}

void FBaseGame::Init()
{
    Metrics->Init();
    Menu->Init();
    EosUI->Init();

    FGameEvent Event(EGameEventType::CheckAutoLogin);
    OnGameEvent(Event);
}

void FBaseGame::OnGameEvent(const FGameEvent& Event)
{
    PlayerManager->OnGameEvent(Event);
    Friends->OnGameEvent(Event);
    Menu->OnGameEvent(Event);
    Authentication->OnGameEvent(Event);
    Metrics->OnGameEvent(Event);
    Level->OnGameEvent(Event);
    EosUI->OnGameEvent(Event);
}

VectorRenderFBaseGame のコンストラクタで生成されていましたが、コメント通りですが recreate されているようです。

そして、FGameEvent が出てきました。まだ内容はわかりませんがイベントループに関連する部分になりそうです。

まとめ

今回は main 関数の中の、イベントループに入る直前までの設定や初期化の部分を中心にみていきました。

SDL2 と DirectX に別れた main から、実際の main を司る FMain, EOS Platform インターフェースを wrap するFPlatform、そしておそらくこのサンプルゲームの中心になる FGame, FBaseGame を順に追っていき、FGame がゲームの UI やイベントを管理しているであろうところまでいきました。

次回はイベントループに入っていきたいと思います。

Epic Online Services サンプルの AuthAndFriends のコードリーディング ①

サンプルのアプリケーションもさくっと読めなかったので、手間ですが紐解いていくことにしました。

対象は AuthAndFriends です。
Auth and Friends サンプル | Epic Online Services ドキュメンテーション

ディレクトリ構成

EOS-SDK-18153445-v1.14.1/
  + SDK/
    + Lib/EOSSDK-Win64-Shipping.lib
  + Samples/
    + Achievements/ (他のサンプル達、ここでは代表して Achievements のみ記載)
    + AuthAndFriends/ (今回の対象のサンプル)
    + Shared/
      + Assets/ (サウンド・画像・フォントなど)
      + External/
        + curl/
        + DirectXTK/
        + GLEW/
        + httplib/
        + rapidjson/
        + SDL2/
        + UTF8-CPP/
      + Source/
        + Core/
        + Graphics/
        + Input/
        + Main/
        + Math/
        + Steam/
        + Utils/
        + BaseGame.h / cpp
        + BaseLevel.h / cpp
        + BaseMenu.h / cpp
        + pch.h / cpp
    + Samples.sln
    + Samples.props

インクルードファイル

今回はビルド構成は Debug_SDL の場合を見ていきます。

f:id:you1dan:20220111170430p:plain

  • $(EOSSDKSamplesRoot)/AuthAndFriends/Source;
  • $(EOSSDKSamplesRoot)/Shared/Source;
  • $(EOSSDKSamplesRoot)/Shared/Source/Main;
  • $(EOSSDKSamplesRoot)/Shared/Source/Core;
  • $(EOSSDKSamplesRoot)/Shared/Source/Graphics;
  • $(EOSSDKSamplesRoot)/Shared/Source/Graphics/GUI;
  • $(EOSSDKSamplesRoot)/Shared/Source/Input;
  • $(EOSSDKSamplesRoot)/Shared/Source/Utils;
  • $(EOSSDKSamplesRoot)/Shared/External/SDL2/include;
  • $(EOSSDKSamplesRoot)/Shared/External/GLEW/include;
  • $(EOSSDKSamplesRoot)/Shared/External/SDL2/SDL2_ttf/include;
  • $(EOSSDKSamplesRoot)/Shared/External/UTF8-CPP/source;
  • $(EOSSDKIncludes)

上記ですが、もし DirectX のビルド構成に変えると、 $(EOSSDKSamplesRoot)/Shared/Source/Main/Windows;$(EOSSDKSamplesRoot)/Shared/External/DirectXTK/Include が増える代わりに SDL2 用のものが除外されます。

GLEW というのは OpenGL の拡張のようです。一旦深入りはしません。
GLEW: The OpenGL Extension Wrangler Library

追加のライブラリ

リンカーの設定を見ていきます。

f:id:you1dan:20220111170926p:plain

  • $(EOSSDKLibs);
  • $(EOSSDKSamplesRoot)\Shared\External\SDL2\Lib\x64\Release;
  • $(EOSSDKSamplesRoot)\Shared\External\GLEW\lib\Release\x64;
  • $(EOSSDKSamplesRoot)\Shared\External\SDL2\SDL2_ttf\lib\x64;

f:id:you1dan:20220111171239p:plain

  • EOSSDK-Win64-Shipping.lib;
  • SDL2.lib;
  • SDL2main.lib;
  • GlU32.Lib;
  • OpenGL32.Lib;
  • glew32s.lib;
  • SDL2_ttf.lib;

GIU32.libOpenGL32.lib に関しては Windows の一部として入っているものなので、追加のライブラリディレクトリとしては指定していませんでした。実態は以下にあります。

C:\Program Files (x86)\Windows Kits\10\Lib\10.0.19041.0\um\x86

エントリポイント

int main で検索すると、Shared/Source/Main/SDL/SDLMain.cpp が見つかります。

int main(int Argc, char* Args[])
{
    // Ignore first param (executable path)
    std::vector<std::wstring> CmdLineParams;
    for (int i = 1; i < Argc; ++i)
    {
        CmdLineParams.push_back(FStringUtils::Widen(Args[i]));
    }
    FCommandLine::Get().Init(CmdLineParams);

    FSettings::Get().Init();

    Main = std::make_unique<FMain>();

    Main->InitPlatform();

    //Start up SDL and create window
    if (!Init())
    {
        printf("Failed to initialize!\n");
    }
    else
    {
        //Main loop flag
        bool bQuit = false;

        //Event handler
        SDL_Event Event;

        //Enable text input
        SDL_StartTextInput();

        //While application is running
        while (!bQuit)
        {
            //Handle events on queue
            while (SDL_PollEvent(&Event) != 0)
            {
                bQuit = ProcessSDLEvents(&Event);
            }

            Main->Tick();

            //Update screen
            SDL_GL_SwapWindow(Main->GetWindow());
        }

        //Disable text input
        SDL_StopTextInput();

        //Check if we need to delay shutting down
        Main->OnShutdown();
        while (Main->IsShutdownDelayed())
        {
            //We only update & render (no inputs, no events, etc)
            Main->Tick();

            //Update screen
            SDL_GL_SwapWindow(Main->GetWindow());
        }
    }

    //Free resources and close SDL
    Shutdown();

    Main.reset();

#if defined (_DEBUG) && defined (DUMP_MEM_LEAKS)
    _CrtDumpMemoryLeaks();
#endif // _DEBUG

    return 0;
}

SDL2 関連でいえば SDL_GL_SwapWindow が今の自分ではまだ理解できませんが、描画をしているようです。

そこを除けば、初期化、イベントループ、終了処理という一連の流れが実装されていることが分かります。

ProcessSDLEvents

まずは処理対象のイベントを見ておきます。

void ProcessWindowEvent(SDL_WindowEvent *WinEvent)
{
    switch (WinEvent->event)
    {
        case SDL_WINDOWEVENT_RESIZED:
        case SDL_WINDOWEVENT_SIZE_CHANGED:
        {
            UpdateWindowSize(WinEvent->data1, WinEvent->data2);
            break;
        }
        case SDL_WINDOWEVENT_CLOSE:
        {
            SDL_Event QuitEvent;
            QuitEvent.type = SDL_QUIT;
            SDL_PushEvent(&QuitEvent);
            break;
        }
    }
}

bool ProcessSDLEvents(SDL_Event *Event)
{
    FUIEvent InputEvent = FInput::ProcessSDLEvent(*Event);
    if (InputEvent.GetType() != EUIEventType::None)
    {
        FGame::Get().GetMenu()->OnUIEvent(InputEvent);
    }
    else
    {
        switch (Event->type)
        {
            case SDL_QUIT:
            {
                return true;
            }
            case SDL_WINDOWEVENT:
            {
                ProcessWindowEvent(&Event->window);
                break;
            }
            default:
                break;
        }
    }

    return false;
}

まずは FUIEvent を拾った場合以外についてですが、 SDL_QUIT か Window 関連のイベントを拾っているようです。window が閉じる場合にも SDL_QUIT に変換するというのは常套手段なんでしょうか。

ここから

この先は F が prefix についているクラス FInputFMain を見ていくことになるので、今回はここまでにしておきます。

まとめ

SDL2 のサンプルを前回作っていたので、今回のサンプルもどこから読んでいけばいいのか理解できました。

引き続き理解を深めていければと思います。

Windows で SDL2 を使って最低限の Window をレンダリングしてみるまで

SDL という単語自体初めて知ったのですが、小さいサンプルを作ってみたかったのでやってみました。

環境

VS でコンソールプロジェクトを作成

とりあえずサクッと実行できるプロジェクトを作成します。

デバッグ実行でちゃんと動くことが確認できればOK。

Nuget で SDL2 をインストール

Simple DirectMedia Layer - Homepage

上記の公式からダウンロードしてもいいのですが、パッケージマネージャー経由で入るならそれが楽なのでそちらで探してみました。

まず見つかったのは以下の sdl2 という名前のパッケージ。ダウンロード数もかなり多く、迷わずこれかと思ったのだが公式のバージョンよりだいぶ古い。

NuGet Gallery | sdl2 2.0.5

そこで、もう一つ見つけたのが以下の sdl2.nuget というパッケージです。

NuGet Gallery | sdl2.nuget 2.28.4

こちらは更新頻度も高く追随してくれていそうですので、こちらを使うことにしました。

以下のような package.config が作成されます。

<?xml version="1.0" encoding="utf-8"?>
<packages>
  <package id="sdl2.nuget" version="2.0.18" targetFramework="native" />
  <package id="sdl2.nuget.redist" version="2.0.18" targetFramework="native" />
</packages>

packages ディレクトリの内部は以下のようになっていました。ファイルはかなり抜粋しています。

packages/
  + sdl2.nuget.2.0.18/
    + build/
      + native/
        + include/
          + *.h # ヘッダファイル群
        + lib/
          + Win32/
            + dynamic/
             + SDL2.lib
             + SDL2main.lib

ビルドのための設定

SDL2/Installation - SDL Wiki

Unzip the archive, point your project at its "include" directory for headers, and link against SDL2.lib (and optionally, SDLmain.lib if you want SDL to provide a WinMain() that calls your standard Unix-like main() function). Distribute the SDL2.dll with your app's .exe file, and you're good to go!

上記をみると、include のヘッダファイルをプロジェクトから指すようにし、SDL2.lib (及び SDLmain.lib) をリンクしろとのことです。

ヘッダファイルのインクルード

プロジェクトプロパティの 「C/C++ -> 全般」の「追加のインクルードディレクトリ」に $(SolutionDir)packages\sdl2.nuget.2.0.18\build\native\include を指定します。

ソリューションエクスプローラーの外部依存関係に SDL 関連のファイルが追加されているのがわかります。

lib のリンク

プロジェクトプロパティの 「リンカー -> 全般」の「追加のライブラリディレクトリ」に $(SolutionDir)packages\sdl2.nuget.2.0.18\build\native\lib\Win32\dynamic を指定します。

一年後の 2023/10 頃になって、改めてこの手順を実行したときには、この設定では失敗しました。 $(SolutionDir)packages\sdl2.nuget.2.0.18\build\native\lib\x64 にすることで成功しました。

続いて、「リンカー -> 入力」の「追加の依存ファイル」に SDL2.libSDL2main.lib を追加します。

とりあえずビルドする

問題なくビルドできました。

最低限の Window をレンダリングするコードを書く

main の引数は以下のように定義しておく必要があるようです。

#include "SDL.h"

int main(int argc, char** argv)
{
    SDL_Init(SDL_INIT_VIDEO);
    
    SDL_Window* window = SDL_CreateWindow(
        "SDL2 TEST",
        100, // window のX座標
        100, // window のY座標
        1024, // window の幅
        768, // window の高さ
        0
    );
    
    if (!window) {
        SDL_Log("Failed to create window: %s", SDL_GetError());
        return 1;
    }

    // とりあえず表示の確認
    SDL_Delay(5000);
    
    SDL_DestroyWindow(window);

    SDL_Quit();
    return 0;
}

実行してみる

以下の Window が指定の時間表示されて消えました。成功です 🎊

SDL2.dll は?

bin/Debug には配置されていました。
SDL2.dllsdl2.nuget の依存でインストールされる sdl2.nuget.redist に入っており、ここから配置用の dll がコピーされているのだと思います。

まとめ

とりあえず最低限のサンプルが動作させることができました。ここからゲームループを作るような部分も理解を広げていければと思います。

参考にさせていただいた記事

Google Colaboratory と Github を連携させつつ C++ の演習環境を作る

動機

REPL が好きなのですが、C++ (Win) でいい感じの REPL が無いものかと探していた中で以下のページにたどり着きました。

mycolabnotebooks/learncpp.ipynb at master · kalz2q/mycolabnotebooks · GitHub

Google Colab は使ったことはあったものの、Python 環境でしか利用したことがなかったので、まさか C++ でも使えるとは驚きました。
しかも Github に保存もできるということで、ログを残すにももってこいだなと思い、同様の環境を作ることにしました。

Google Colaboratory と Github の連携

Github に保存用のリポジトリを作成しておく

ipynb ファイルの保存先になります。雑に作って問題ありません。
作った直後だと branch が無い可能性があるので、README.md あたりを作っておくとスムーズです。

Colab のノートを Github に保存する

迷うまでもなく、そういうボタンがあります。 f:id:you1dan:20220109085216p:plain

おそらく初回では Github との連携の許可を求められるので許可します。 f:id:you1dan:20220109085417p:plain

許可が終わると、保存先のリポジトリを選択できるようになるので、先程作ったリポジトリを選択し OK します。 f:id:you1dan:20220109085539p:plain

Github に保存されていることが確認できました 🎉 f:id:you1dan:20220109085727p:plain

C++ の演習環境

最初に貼ったページの通りですが自分のメモ用に。

実行したい C++ のコードを temp.cpp に書き出し

%%writefile temp.cpp
int main {
  return 0;
}

コンパイルし、生成された a.out を実行するだけです。

!g++ temp.cpp; ./a.out